You may edit a class (if applicable) directly through your Student Center during either pre-enrollment or open enrollment (prior to the start of each semester). If your enrollment window has closed or an enrollment deadline has passed, please reach out to your College or School Registrar for further guidance.
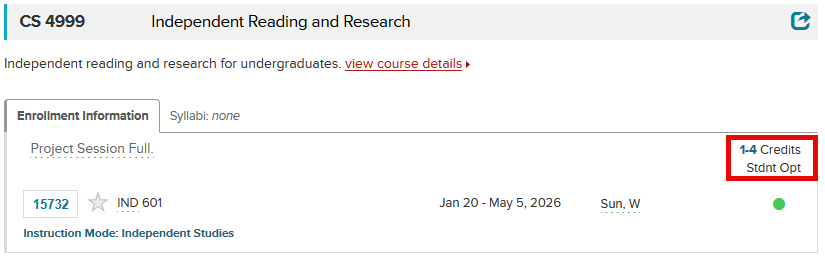
Some classes have a variable grading option (ie: Student Option Grading) and/or variable units (ie: 1-4). Upon successfully enrolling in a class, if you notice that you have enrolled for the incorrect grading option or units, you may edit these fields through your Student Center.
Note regarding the Audit grading basis – The grading basis of ‘Audit’ is unavailable to Undergraduate students. This grading basis is only available to Graduate Students.
For our example, we will be editing our enrollment in CS 4999 601.
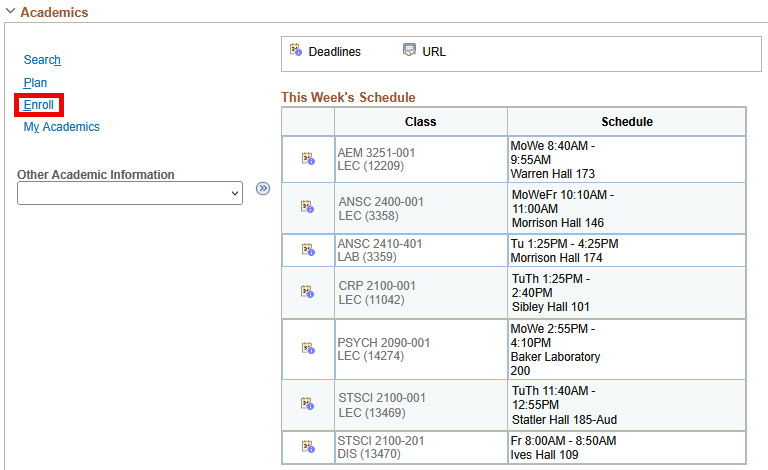
To start, after logging in to your Student Center, click on Enroll.
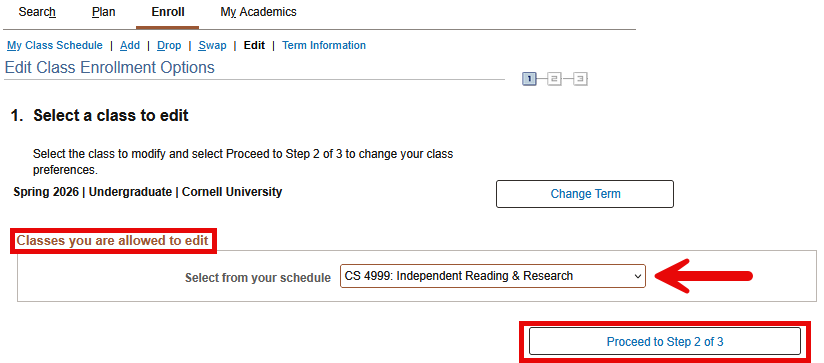
Step 1 - Select a class to edit
Select the term in which you will be changing your enrollment.
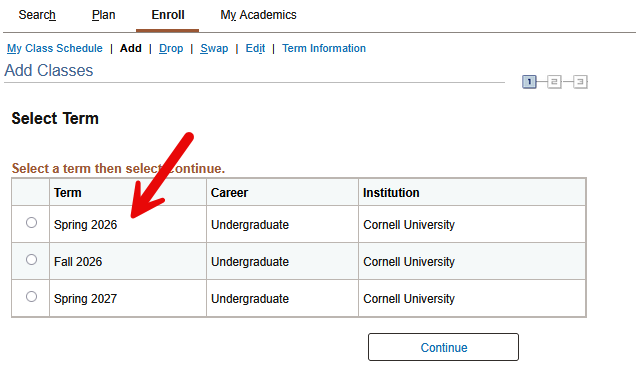
Select Edit under the Enroll tab.

In the section labeled Classes you are allowed to edit, select the class that you are interested in updating the grading option or units and than select Proceed to Step 2 of 3.
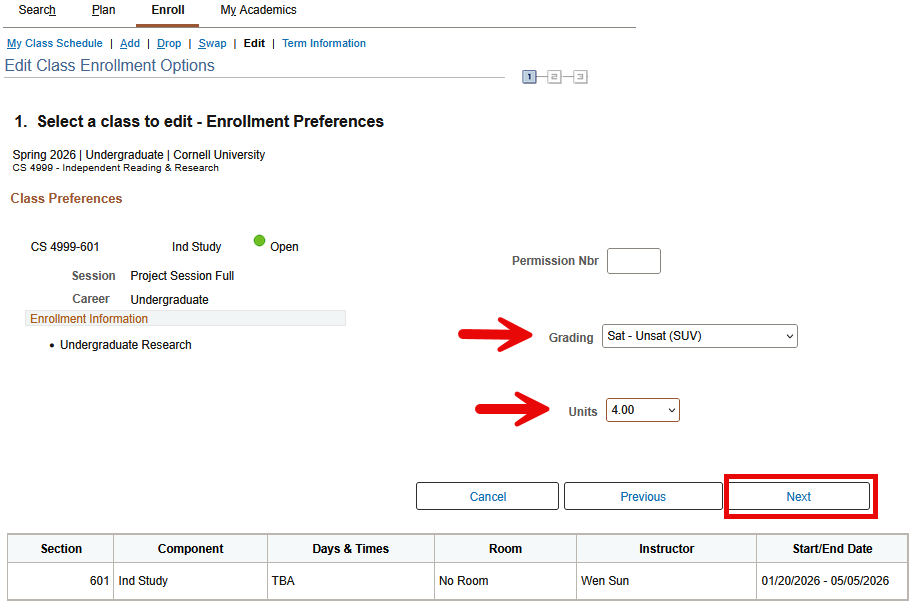
On the Enrollment Preference screen, select the correct grade option from the Grading drop down or number of units from the Units drop down. After you have selected the correct values, click Next.
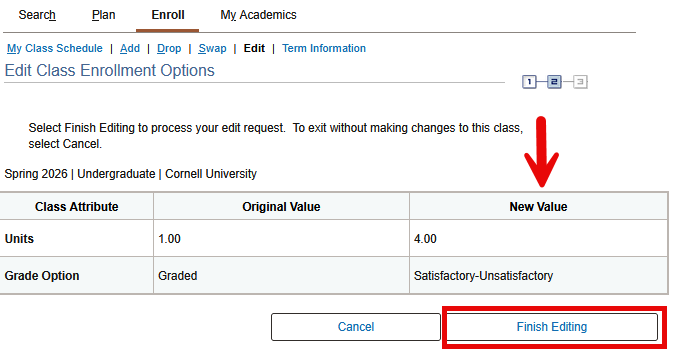
Step 2 - Confirm New Units and/or Grade Option Values
Confirm that information that you have edited is accurate. If the information is accurate, click Finish Editing.
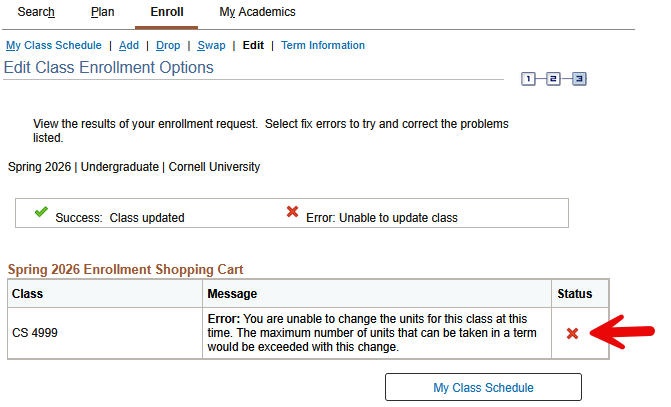
Step 3 - View Results
If your edit was successful, you will receive a success message and a green check mark in the status field.
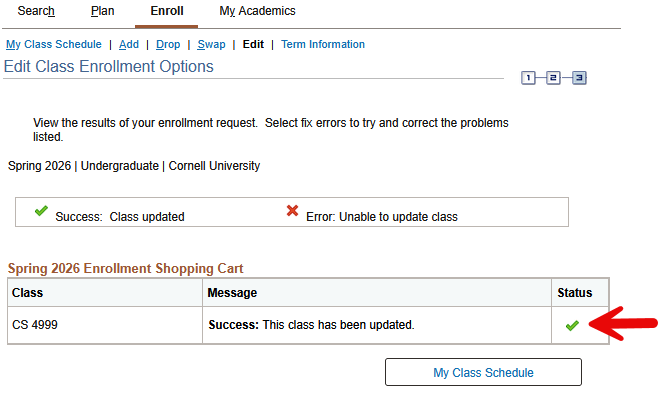
If your edit was unsuccessful, you will receive an error message and a red X in the status field.